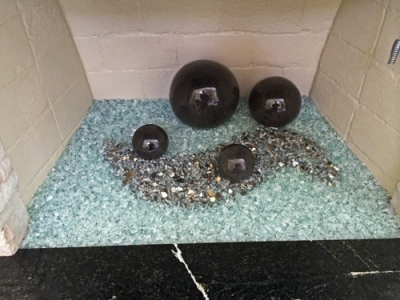
Propane Burner
Self Installation
The following pictures are from our customers who installed their propane burner systems themselves. From fire pits and fireplaces, the process is simple once all the upfront work has been completed. Meaning you've sent us your measurements and pictures so that we understand exactly what you need.
Our products do not require any certification from the AGA, CSA or UL as it is considered a stand-alone product by these agencies.
The agencies are franchise operations and they are privately owned and they are not a government agency. These agencies are hired for mass production testing and AGA, CSA and or UL do not certify custom one of a kind projects.
Custom burners need no certification as this only applies to production equipment. Just so you can understand that a certification costs about $15,000.00 and certification was developed for production/ mass production to assure quality. Any parts that would normally need AGA or UL do in fact have these approvals. Parts with function need and should have some sort of approval. The pan burners we sell that do have UL, CSA and or any other listings are produced by other companies.
The custom pan burners that we produce are just that, custom. Therefore do not require UL, CSA and or any other agency listings as these are custom. The parts that we use to build these pans are UL, CSA listed as they should be. We would never use any “Third World Country” or any unlisted, untested parts to build any products and or parts to endanger any product performance what so ever.
Our customer Gary Gibbs went to his local home store and bought an outdoor wood burning fire pit. This was placed within a custom marble and brick encasing.
We then helped him to successfully complete his conversion to propane. Gary wanted something more unique than your ordinary round burner ring so he got a stainless steel star burner instead.
The air mixer / valve on the left side had a custom aluminum face plate made to the same size of the existing brick - so to be as unobtrusive as possible once installed.
Add some FireGlass and light to enjoy the beauty and superior warmth that you can only get with FireGlass. Notice the patio umbrella, which if placed at least 60" inches above the fire pit will further help keep the heat around the sitting area.
These outdoor propane fire table / fire pit pictures come to us from Doug Robertson. We helped Doug build his dream fire table all through Emails and phone conversations. So check out the progress from start to finish.
We sent him an Aluminum pan and an H-burner designed to work safely with propane, as well several pounds of 1/2" Clear Base Glass FireGlass and Mini Mint Green Diamonds.
Here is what Doug had to say:
"Good Morning Ed,
Just wanted to drop you a note and thank you very much for all your e-mail
help with my Fire Coffee Table. We have used it every night since I got it
going and have received many-many compliments about it."
The fireplace below is a propane fireplace with our propane pan burner and the glass that was use is:
From beginning to end.
This was a custom size pan because of the smaller size of the fireplace, but we can build anything.
Above we have the old burner with a smaller flame pattern which we will change to a double burner in our tray propane pan burner.
The fire pit/ table is at the Roxbury Hotel and we will show you the progress here from beginning to end. This was a propane installation with our
).
The fireplace below was installed by the customer (Kim Clark) with a remote control,
propane burner manufactured by us and Topped with
Starfire Base Glass. The fireplace was transformed form an ordinary to work of art, nice job!
The picture below has the burner being tested. This is the remote control on the lower right with the pilot light assembly
The fire pit below was build by Mike Phillips ( a customer). First he ran a propane line to the fire pit area and then blocked his fire pit into shape. We use a
FPPK (fire pit propane kit) in an aluminum pan 24" x 24" with a double 18" double stainless steel ring.The glass that was used was a
Gray Base Glass and
Gray Reflective Base Glass on top to add sparkle. Below you can see the placement of the thermocouple and safety pilot light used for propane.
Below on the right side the controls were installed in the bricks.
The fire pit below belongs to Mike DeVito in Northern California. When I saw his idea I was excited to help him create something new and wonderful. He took a very old mining cart in his front yard and we helped him convert it to a propane burning fire pit! Turned out pretty cool! Next he is getting a fire pit cover.
Here you see the controls, air mixer and thermocouple and pilot light lines under the base plate. You can use a larger (3/4", 1" lava) as a base under our 1/4" crushed lava as this will save you a few dollars.
Now we pour on the crushed lava to keep the glass from sinking into the larger lava. Add some Starfire Base Glass.
We use a
FPPK (fire pit propane kit) with valves, thermocouple, pilot light and air mixer. The glass that was use is.
Starfire Base Glass over a bed of
crushed lava rock,
Yellow Amber Topper,
Steel Blue Topper,
Turquoise Blue Topper,
Green Tubes,
Copper Ruby Red Topper,
Ice Ice Ice Topper, and of course our
Diamonds in Clear, Pink, Amber and Blue. I think this is one really nice idea!
Fill in and all around the pan with
crushed lava rock. On the left side you can see the gas connection which will soon be covered as well. On the right side the control cover will be covered as well. This
propane pan burner was fitted with a remote control, radio frequency.
Now that you're finished you're ready for FIRE!
The carousal Propane fireplace below was installed with a dual battery operated 100,000 BTU propane electronic ignition system. Each capable of 100,000 BTU's of fire. The first pictures show what we had to work with and how it progressed.
Burning wood and logs is just nasty and dirty! True story!
Above you can see the soot that come out of the fireplace and and leaves your house smelling so carbon monoxide fresh! YUCK! Add a bit of lime stone.
A few pieces of copper. Below you can see the sand bed and the ignition box we built.
Below are the two vent we installed for the air mixers inside of the
ignition systems.
And here we are finished. The glass that was used was
Starfire Base Glass FireGlass,
Gold Base Glass FireGlass and
Ice Ice Ice Topper. Now isn't that much better little feller? Modern times call for modern measures! I guess that's why we are Moderustic!
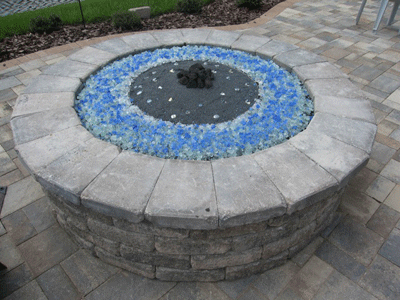
The fire pit below was built by Scott Spector in Florida. He started with an FPPK 30 which includes a 30" base plate and a double 24" stainless steel ring. Here we go from the beginning. The propane line was run/ installed under the pavers.
The colors that were used are, 1/2" Clear Base Glass, Black Magic in the center, Clear Diamonds, Cobalt Blue Topper, Clear Topper, Cobalt Blue Light Topper and our FPPK 30". That is our 30" propane burner. You can see the actual burner above burning before shipment and installation.
We don't have any pictures of the fire pit burning at Scott's but he did tel us that when he fired it up again he would try to send us a few pictures. Thanks Scott.
The fire table below was built by Christina "Stina" in the San Francisco area. With a little ambition, imagination and our help, she DIY'ed this fire table. Below the teak table that would undergo the transformation.
By making a simple, inexpensive paper template of the pan and placing it under the table we understand where the mounting tabs will be located. Assuring that installation goes as smoothly as possible.
And here a few days later the pan, burner and glass is installed. Stina chose Galaxy Green Base Glass.
The fire pit below was purchased locally and then we converted it to burn propane without soot! The colors used were, Starfire Base Glass, Water White Base Glass, Bronze Base Glass, Azurlite Base Glass, Ford Blue Base Glass, Evergreen Base Glass, Galaxy Green Base Glass, Black Base Glass, Gray Base Glass and topped with 1 lb of Copper Ruby Red Topper. I guess he wanted a lot of color. Here is what is looked like when he started. These manufactures have no imagination! This only cost about $100.00, complete!
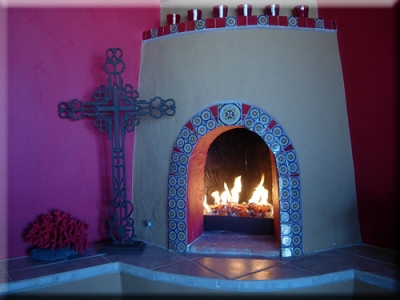
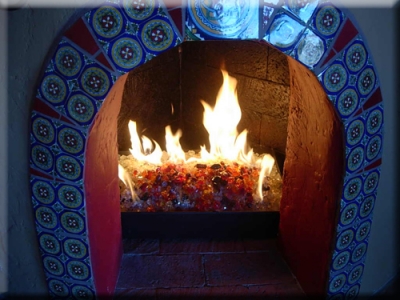
This next fireplace was installed in Mexico by Roy Quick. It turned out amazing.
The base glass that was used is: 1/4" Clear White Base Glass, and Scarlett Toppers, accented with Gold Base Glass on top of it all.
The propane pan has a removable front skirt/ cover to conceal the controls.
 |
 |
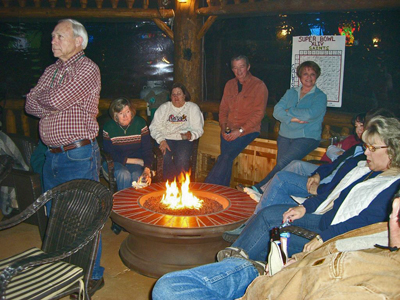
A Super Bowl Fire Pit (Propane Converted o Propane)
The following Propane Burner was designed for our customer Richard King of South Carolina. He was throwing a super bowl party in his gazebo and he wanted to convert his existing propane fire pit to one that could burn without sooting while still using propane. So of course he came to us to make sure he'd get a clean burn.
Below is what was sent to us to convert. As you can see the flames were rather small and had no air mixer whatsoever - so there was a lot of soot and black smoke! The reason is once you start to turn up the fire, the soot starts to show. So often you will be told not to turn up the flames. Which makes us say - Whats the Point Than!
Now we step in. We calibrate the air mixer to the ring, valve system, pilot light and thermocouple. And as you can see the flame goes from low, medium and then to turbo high without sooting! Allowing you to burn cleanly while using a propane gas.
And here is Richard's hand built gazebo, which turned out beautifully!
Here is the fire pit turned up so you can see that we installed one of our FPPK (fire pit propane kit) The tank was under the deck. Richard may of had a few flex lines that were a bit too long. though.
The controls were adapted to his old controls.
Thanks for the pictures Richard, looks like the 2009 Super Bowl Party was a big success!
The wine barrel below was build by one of our newer dealers in Texas. Matt's Custom Welding. Contact us for information about Matt's wonderful work. We are going to be much more of Matt's work and look around his showroom in the pictures below. Many more projects to come.
There was a steel bowl installed using our propane system to burn our glass. They used Bronze Base Glass in the fire pit.
Below you will see how simple it is to convert/ install a propane into your table. This is our FPPK box with controls and air mixer calibrated to the burner we are using.
The next few pictures are from New York by Jai Crandall for Tom Morgan. We can hep transform an eye soar to a place of enjoyment. Just watch!
Here is what was fabricated to replace those old ugly grills.
Jai came up with the Stainless Steel hollow base design and we went to work. Our propane burners were set to 100,000 btu's each for maximum heat. The glass that we used was Bronze Rust Copper Base Glass.
Here is what he had to say,
November 10, 2009
Hello Ed, my name is Jai Crandall and I live in central NY. I have a good friend (Tom Morgan) that has a patio that he generally uses wood to throw some heat for his quests when he entertains. Unfortunately, as I'm sure you know, the smoke can really get to you after a while. This is a very high end home and he entertains for some very important people. He would like to eliminate the wood a replace them with some propane inserts. It doesn't have to look like a fireplace, but most importantly, it needs to throw some intense heat.
Pictures 1,2 and 3 are the front views of the fire pits and as you will notice they are not square ( each picture is labeled with the dimensions), they don't need to stay like they are, so if you want to make them square you can. Just go by the front measurement. Hopefully you can design something that will fit there needs.
I am sure that they are going to want electric ignition, and you can try to place the control valves in the front. Also, with the good New York weather, you want want to have covers for each unit.
Thank You so much for your time and I look forward to working with you to complete this project.
Jai Crandall
July 3, 2010
Now here are the finished pictures on the property. Very nice!
Hey Ed, Here are some pictures of the burners that I installed. They look great and they are very happy with their performance. Also, I believe that I may have a few more people interested in something similar to what I did for Tom Morgan. Have a great forth weekend and I will talk to you soon.
Jai
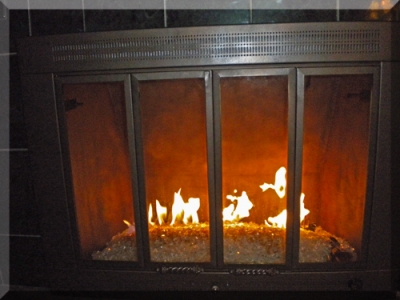
The fireplace below belongs to Marcia and here is what we did to update her fireplace. First here is what your fireplace may looks like now, nasty!
We reconfigure the pilot, burner, base plate, venturi and get it to burn properly. Nice flames, then we continue.
If you look below we are showing you proper pilot light placement.
The glass that we used was a Starfire Base Glass, Bronze Rust Copper Base Glass and Bronze Reflective Base Glass on top.
If your fireplace does not work this easy or look this simple, then we didn't do it! Let us help you make your fireplace work right and look good.
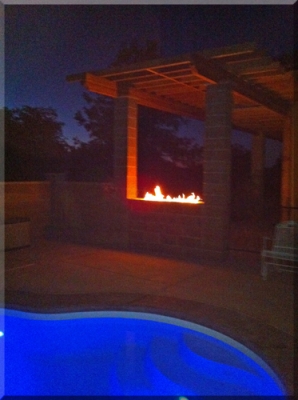
This is a simple but clever idea for utilizing an nontraditional area for an outdoor propane fire pit. We used a stainless steel pipe, which we always recommend for outdoor use. You can see the cinder block hollowed out. You don't need a pan, the block is the pan! Below you see the stainless steel burners on a bed of crushed pea gravel. -The burners were calibrated to the Copreci Valve to insure a clean burn.
Be warned there are so many companies out there who sell propane without addressing the issue of using FireGlass and they will leave you holding the bag. Too many times we see this situation and the customer is told they need a pan, why? Ohhhh, because the dealer needs your money more than you do!
Below you can see the Copreci and air mixer mounted to a bracket on the end of the pit. Remember, the air mixer and Copreci have to be calibrated to the burner or it won't work! There is no magic bullet, it's pure and simple knowledge. Propane Burners have to be dealt with great care. The glass that was installed was Ford Blue Base Glass.
Done, simple but effective at creating a great outdoor atmosphere.
This next fire pit was built by Tim and Sarah, they simply built this with stacker stones and a bit of ingenuity. The used a crushed lava base with Black Base Glass topped with Black Reflective Base Glass. Then they used a Light Amber Topping to create the Fleur De Lis. This was done with a propane valve that we supplied. They used a wood burning fire bowl for the pit. The tank was accessible from the back of the fire pit. Add the base crushed lava. Note we do not use the 3/4" size? Way to large for the glass as it will fall through. You can use the larger lava and then over it with the crushed lava to save some cash!
Below if you notice the Pilot Light and Thermocouple just inside of the ring? This is a must if using propane, for safety.
And you're done!
(See Our General Propane Sheet)
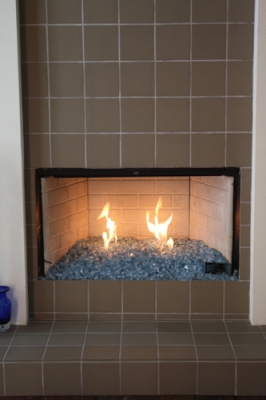
These fireplace photos were sent to us by a customer in Palm Desert, CA. We will show you step by step on how to install a clean burning propane pan burner, no really.
First clear out your fireplace and paint with stove paint if desired.
Hook up the flex line and check for any leaks before going any further.
Lava will be provided with your pan. Fill only inside the pan area. Light again and check your flame pattern.
On this application pea gravel was used to fill the backside of the fireplace. Make sure to keep your gravel/lava a couple of inches back away from the front.
This particular propane pan burner used Sky Blue Base Glass.
Now install your patented FireGlass over your pan and everywhere else. Make sure your pilot is still above the surface of the glass or it will not work properly. Controls must also be exposed to operate.
The next fire pit was a customer conversion with our FPPK propane attachments and burner. What ever project you are converting or working on, we monitor your project all the way through. Provided you send pictures.
The next fireplace is from Chris
Ackopiantz in
Palos Verdes California.
Chris lives in a condo complex with only wood burning fireplaces. Chris received permission from his complex to add a propane fed fireplace. Burning wood is not only dirty and nasty, it is very unhealthful as well.
Here are his pictures from beginning to end:
The glass he used was a:
